In order to keep the operational feel of CAD systems that have been used up until now, a Windows Ribbon Framework was adopted, and it can be fully customized by customers.
Our goal was to make the program as easy to use as possible so that it can be used by anyone and to reduce worktime.
You can freely customize the Ribbon Menu. You can add and delete tabs, and add and delete menus.
It is also possible to change the size of the icons, and customize the menu according to your work style.
Various icons including "Large Icons", "Small Icons", "Icons with Text" and "Icons without Text" can be placed arbitrarily on the Ribbon Menu.
Ribbon Menu

The following will explain how to customize the menu.
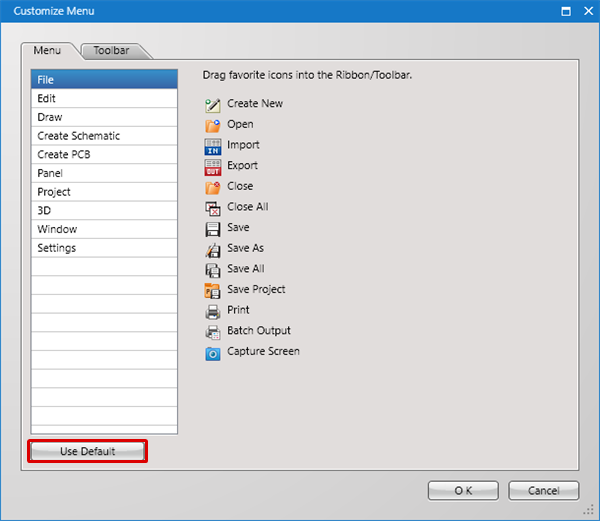
* For each operation for customizing the menu, perform customizing after going to "Customize Menu" Mode in Customize Menu.
- Customize Menu
- Adding Menus
- Changing the Menu Order
- Deleting Menus
- Adding Ribbon Tabs
- Deleting Ribbon Tabs
- Changing the Size of Icons
- Adding/Deleting Boundary Lines
- Returning to the Default Settings
How to Customize
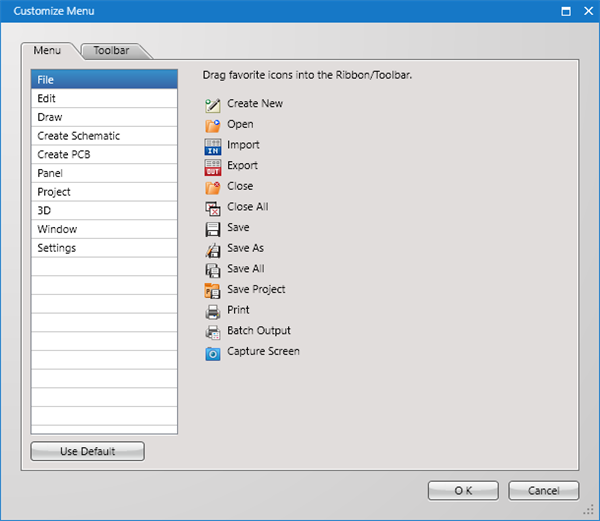
| The following will explain the how to execute Customize Menu. |
| (1) |
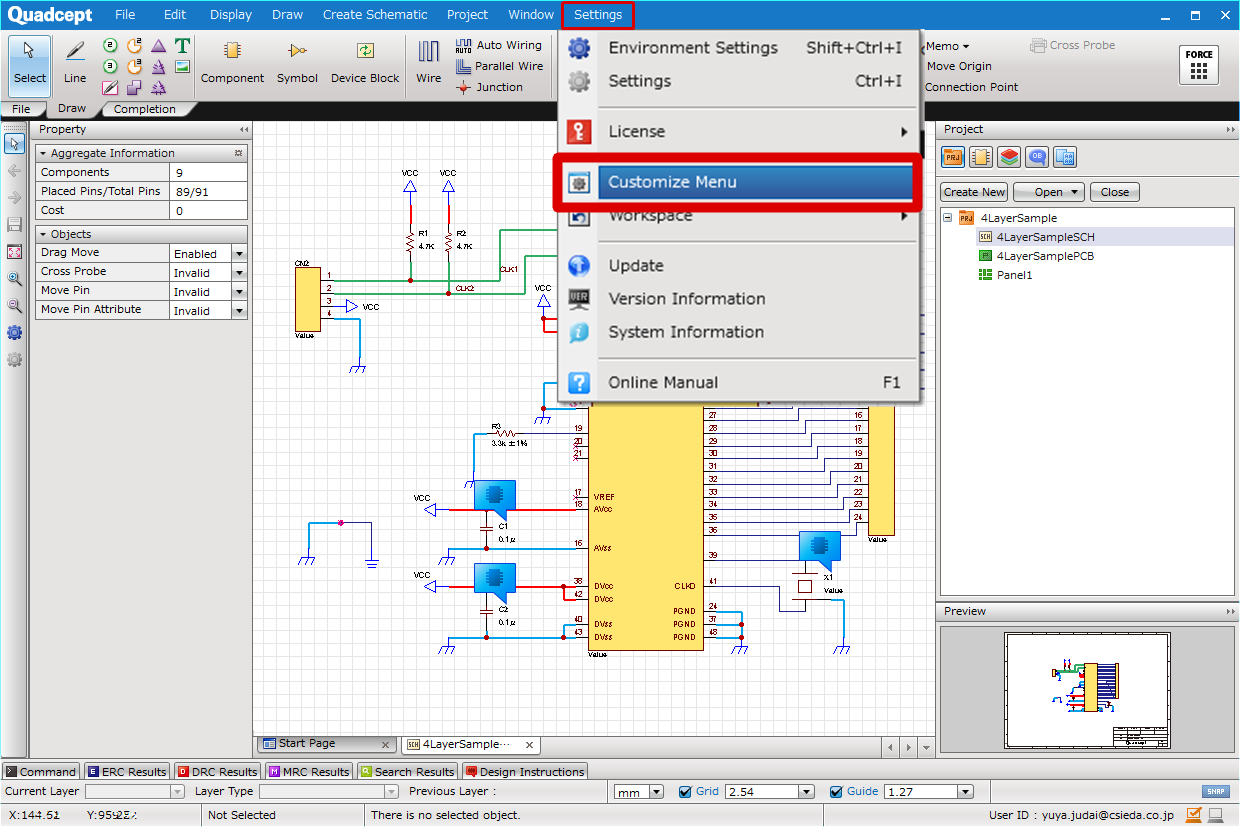
Click [Settings]
=> [Customize Menu]. |
|
 |
| |
The Customize Menu screen will open. |
|
 |
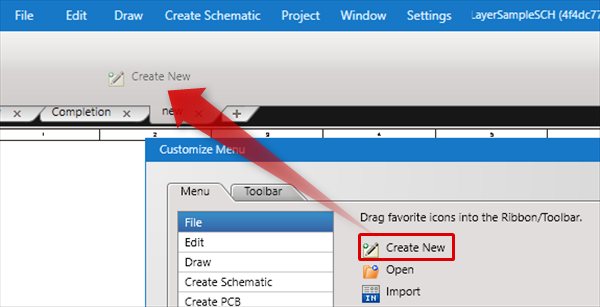
| The following will explain how to add new menus. |
| (1) |
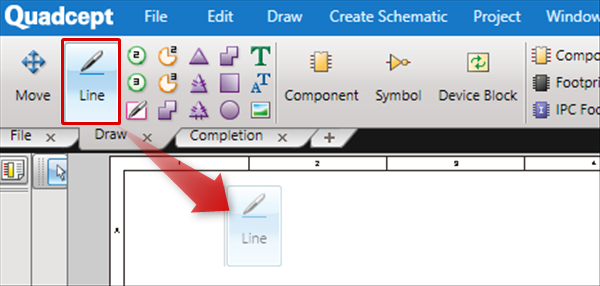
From the Customize Menu dialog, select an icon, and drag and drop it to move it to the Ribbon. |
|
 |
| The following will explain how to switch the menu order or change the position. |
| The following will explain how to delete unnecessary menus. |
| (1) |
Drag a menu icon off of the Ribbon Menu |
|
|
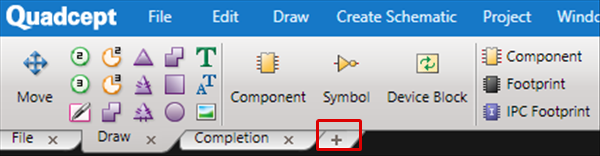
If the existing menu tabs are insufficient, you can add new tabs.
The following will explain how to add tabs. |
| (1) |
Click the "+" tab on the Ribbon. |
|
|
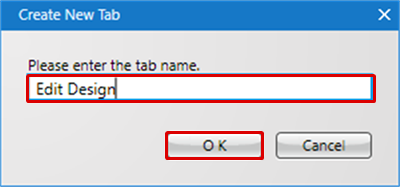
| (2) |
Input a tab name, and the click "OK". |
|
 |
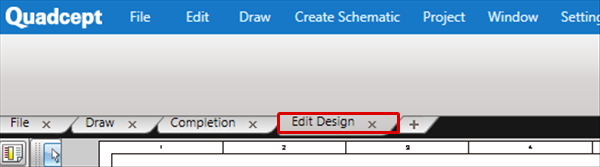
| |
A new tab will be created. |
|
 |
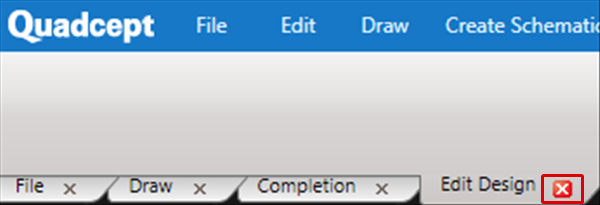
| The following will explain how to delete unnecessary Ribbon tabs. |
| (1) |
Click the "×" that appears on the right side of the Ribbon tab. |
|
|
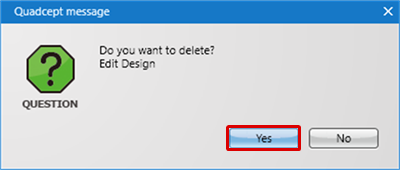
| (2) |
| In the deletion confirmation screen, click "Yes". |
|
|
 |
Various icons including "Large Icons", "Small Icons", "Icons with Text" and "Icons without Text" can be placed arbitrarily on the Ribbon Menu.
The following will explain how to change the size of the icons. |
| (1) |
Select an icon and right click. |
| (2) |
Switch the settings such as by selecting "Show Text" or "Bottom Text". |
|
 |
Icon Type
| Show Text (Bottom Text) |
Show Text |
No Text |
 |
 |
 |
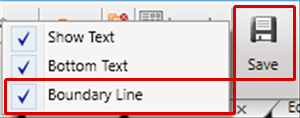
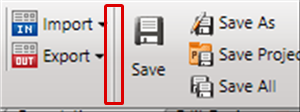
To add a Boundary Line, select an icon on the right side of where you want to display the boundary line, and right click.
It can be added by turning "Boundary Line" ON, and it can be deleted by turning it OFF. |
| (1) |
Select an icon, right click, and the click [Boundary Line] |
|
 |
| (2) |
A Boundary Line is created on the left of the selected icon. |
|
 |
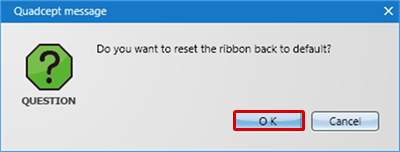
| To return to the initial default settings, click the "Use Default" button. |
| (2) |
A dialog will appear. Click "OK". |
|
 |