

Schematic Capture : Placing Labels
Placing Labels
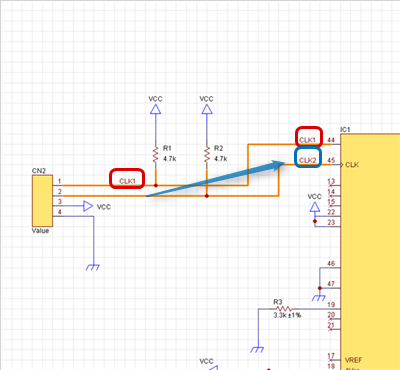
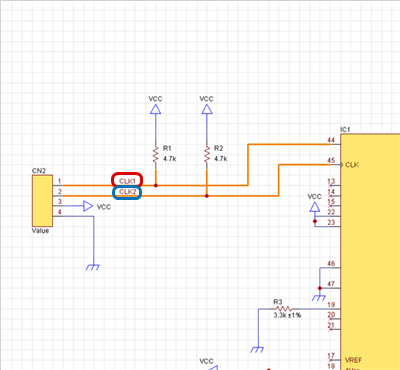
With Quadcept, the wire Net Name can automatically be assigned when routing, but this can also be specified by the user by placing labels.
Using this, it is possible to make Net connection between wires that are far apart, and between schematics by placing labels with the same Label Name.
About Labels
By placing a label, the Net Name is specified and displayed. Therefore, the Label Name and Net Name are interlocked.
Label Name = Net Name
When the Label Name is changed, the Net Name of the wire where the label is placed is also changed.
Labels can be posted arbitrarily on wires.
Labels can only be placed on wires. They cannot be placed at a position where there is no wire.
|
When specifying the Net Name to a wire, the label is displayed. |
It can be moved, and multiple display is possible. |
|
|
 |
When placing labels, it is possible to group wires by using a Bus,
and by using ports, it is easy to find wire connection destinations.
For more details about placing ports, refer to Placing Ports, and about placing buses, refer to Routing Buses.
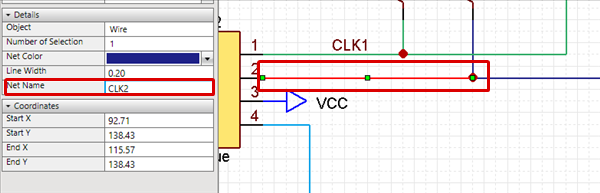
You can confirm the Wire Net Name by selecting a wire => [Net Name] of the [Property Window].
Placing Labels
There are different methods for placing labels.
Drawing and Placing Labels
Batch Label Placement
Automatic Placement by Inputting a Net Name to a Wire
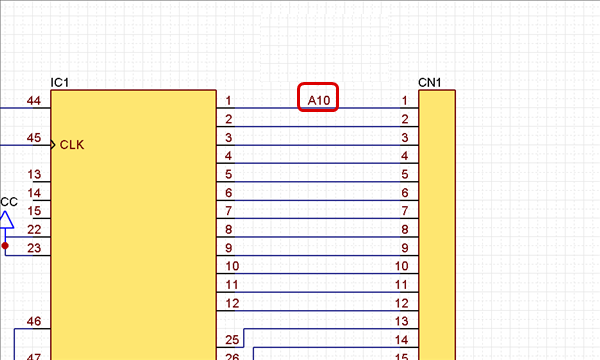
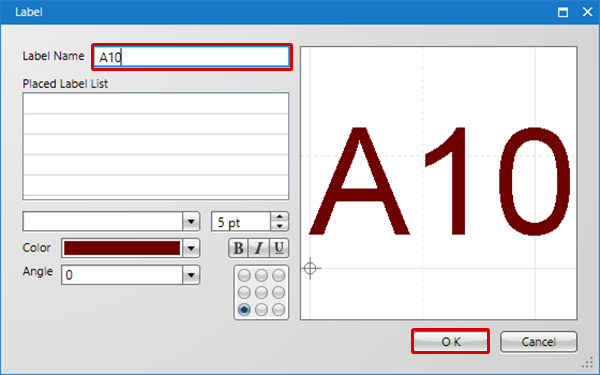
| Drawing and Placing Labels |
| Place a label on a wire and specify the Net Name. Labels can only be placed on wires. The following is the operation for placing labels |
|
 |
|
 |
|
 |
When a label has already been placed on a wire, or when the Net Name has already been determined after connecting to the Power Supply,
the Label Name auto merge process will occur.
The Label Name will merge according to the following order; Power Supply Name > Wires with Labels and Ports > Wires without Labels.
When the end of the label is a numerical value, after placement, it will automatically be incremented.
*If you do not want it to auto increment, press the Ctrl key when placing.
Batch Label Placement
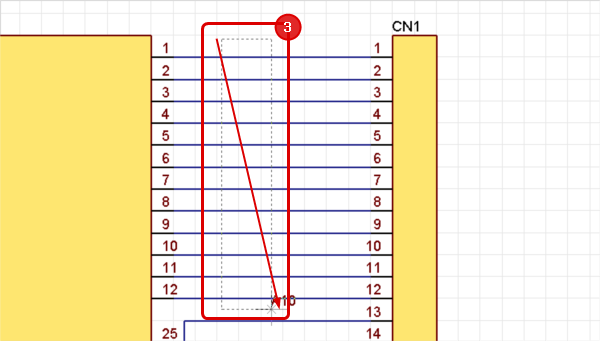
| Batch Label Placement |
| Place all labels on multiple wires and specify the Net Name. When the end of the label is a numerical value, the numerical value will automatically be incremented. The following is the operation for batch label placement |
|
 |
|
 |
|
 |
|
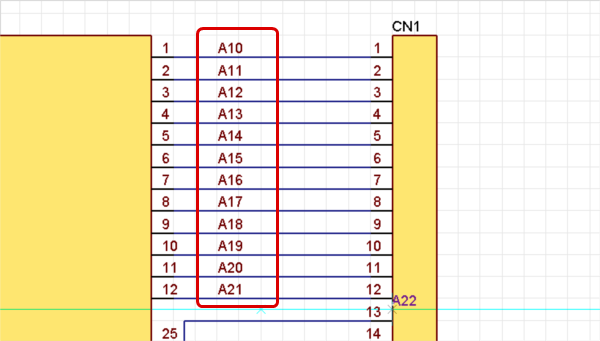 |
If you drag from the bottom, the numerical value will increment from the bottom.
If you do not want it to increment, press the Ctrl key when placing.
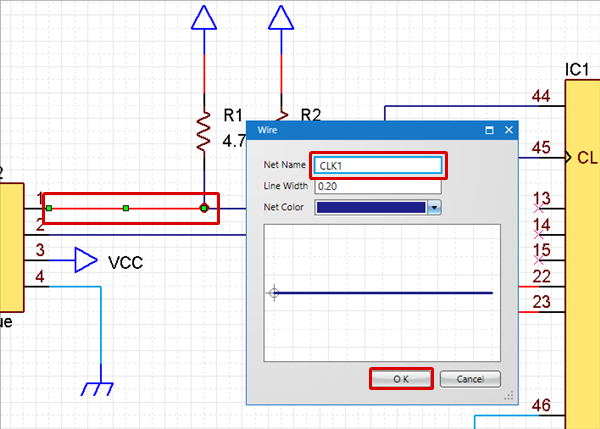
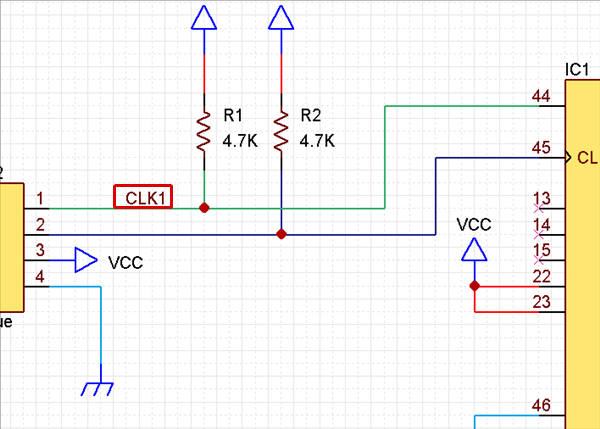
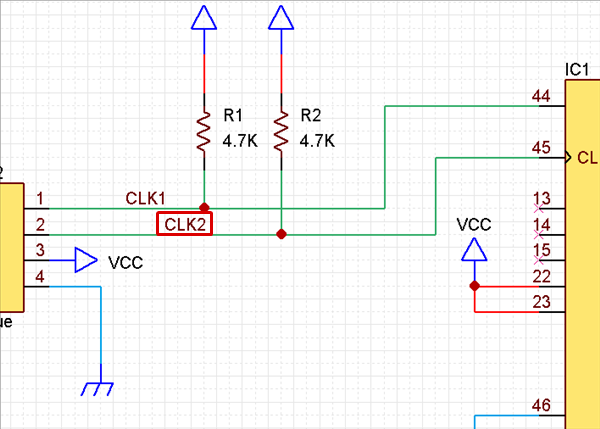
Automatic Placement by Inputting a Net Name to a Wire
| Automatic Placement by Inputting a Net Name to a Wire |
| When a Net Name is input to a wire, the label will be placed automatically. For inputting Net Names, you can double-click a wire to edit the Net Name on the Wire screen, or you can edit it from the Property Window. |
|
 |
|
|
|
 |
|
 |
Each Operation for Drawing Labels
The following will explain each operation for drawing a label.
Selecting the Label Menu
Batch Label Placement
Rotating Labels
Exiting Label Mode
Selecting the Label Menu
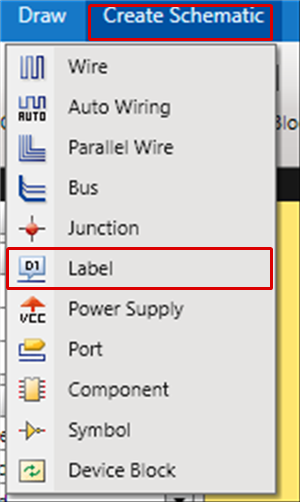
[Create Schematic] Select => [Label]
There are several other ways to perform this. Refer to About Executing Menus.
Rotating Labels
While drawing, it rotates 90 degrees.
There are the following methods for rotating.
Method 1: [Right Click] => Select [Rotate]
Method 2: [Keyboard] => Press [R]
Rotate Example
| Before Rotate | After Rotate |
|
|
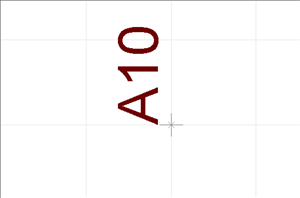 |
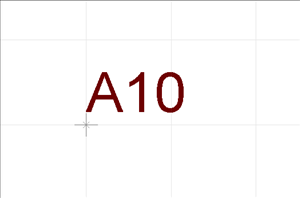
Rotation is 90 degrees to the left. There is also a Reverse Clockwise Menu.
Exiting Label Mode
The following is the operation for exiting Label mode.
When not creating a label,
Right click, Select => [Cancel].
* Press "Escape" on the keyboard