Filters allow you to configure settings for make it possible or impossible to select various Objects (Components, Symbols, Lines, Rectangles, and Squares) etc.
Editing and moving of objects for which a filter is OFF is restricted, so configure settings according to your work situation.
The filter ON/OFF status can be saved/read using Filter List. Use frequently used filter combinations by toggling.
| |
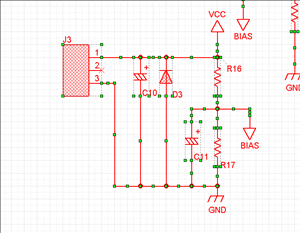
No Filter, Select All |
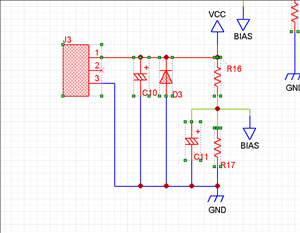
Component Filter ON, Select All |
| Filter Screen |
|
|
| Select All |
|
|
It is convenient to toggle all filter checks ON/OFF using ON/OFF Toggle All.
You can also toggle using the "Space" shortcut.
Even when the filter is all off, the search and selection of objects by a search feature or "Object Window" are possible.
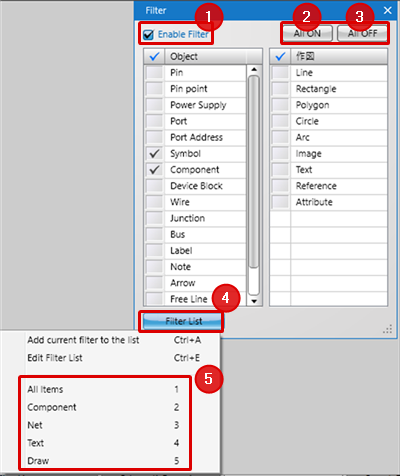
Description of the Filter Screen
| |
Item |
Content |
Shortcut |
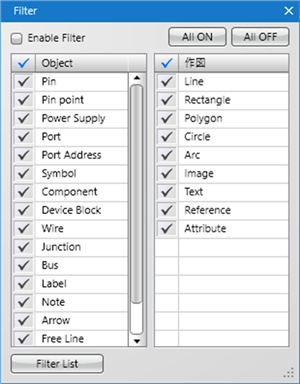
| (1) |
Enable Filter
|
Toggles Enable Filter ON/OFF. Filter is enabled only when a check is placed.
|
Shift + F |
| (2) |
All ON
|
Places a check for all items.
|
Space |
| (3) |
All OFF
|
Removes the check for all items.
|
Space |
| (4) |
Filter List
|
Displays a list of registered filters.
|
F |
| (5) |
Registered Filters
|
It is possible to configure custom filter group settings according to the user.
Filters can be toggled by "F" + "Number".
For example, to toggle to "All Items" at the top, input "F" and "1" on the keyboard.
|
0 to 9
|
Using Filters
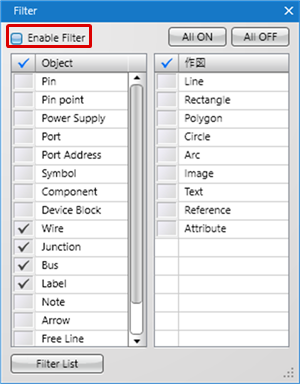
| The following will explain the usage method for when changing the thickness of all wires. |
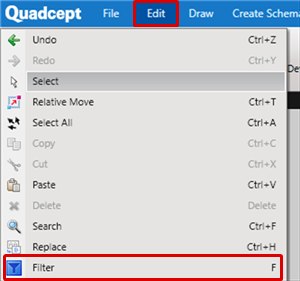
| (1) |
Click [Edit]
=> [Filter].
* Or, press the Shortcut Key "F"
=> The "Filter" window will be displayed. |
|
 |
| (2) |
Place a check next to "Enable Filter" and "Wire". |
|
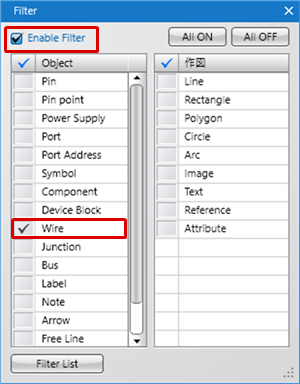 |
| (3) |
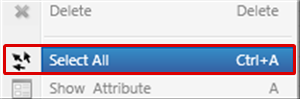
Click [Edit]
=> [Select All]. |
|
 |
| |
Only wires are selected, so confirm the Line Width is "0.2". |
|
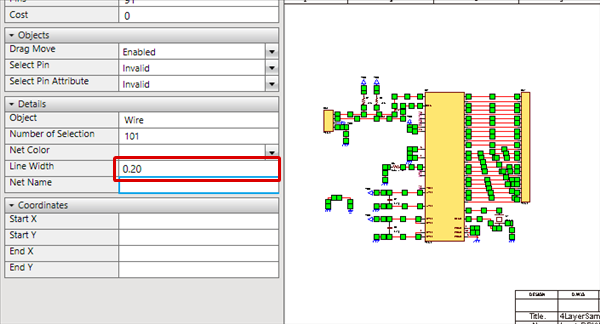 |
| (4) |
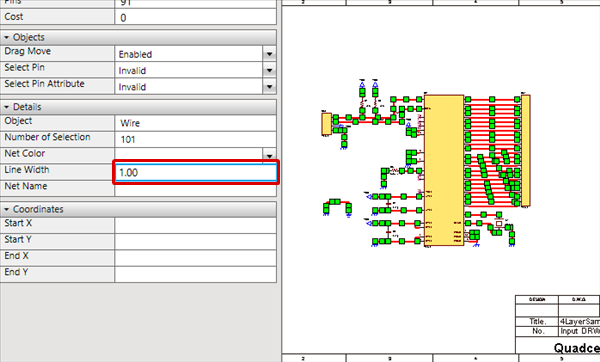
Change the Line Width to "1" and press the Enter key. |
| (5) |
The Line Width for all wires will be changed to "1". |
|
 |
Toggle Enable Filter ON/OFF by right clicking and selecting [Toggle Filter ON].
Filter List
It is possible to save and toggle filter ON/OFF combination groups.
Some have already been prepared in advance, but you can save your own favorite groups.
The following will explain how to use the Filter List.
Add current filter to the list
Edit Filter List (Add/Delete/Edit Name)
Toggle filters
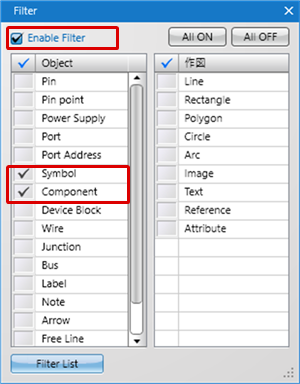
| The following will explain how to save currently set filter group settings, and how to add them to the Filter List. |
| (1) |
Click "Filter List"
=> [Add current filter to the list]. |
|
 |
| (2) |
Input a Filter Name, and then click "OK". |
|
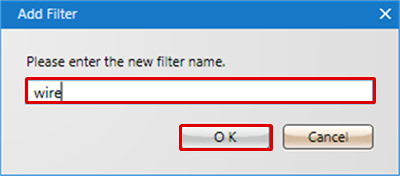 |
| |
"Wire" will be added to the Filter List. |
| |
For more details about toggling, refer to Toggling Filters. |
|
 |
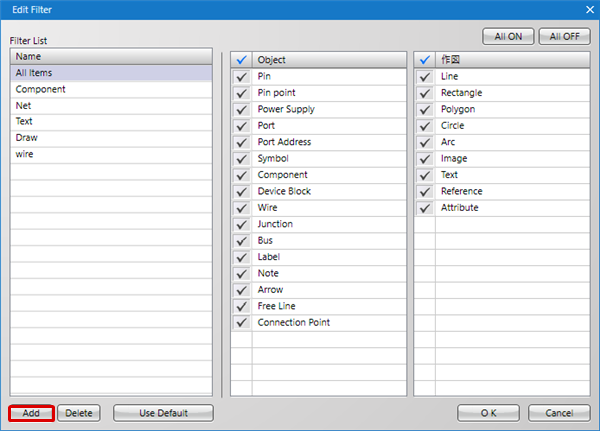
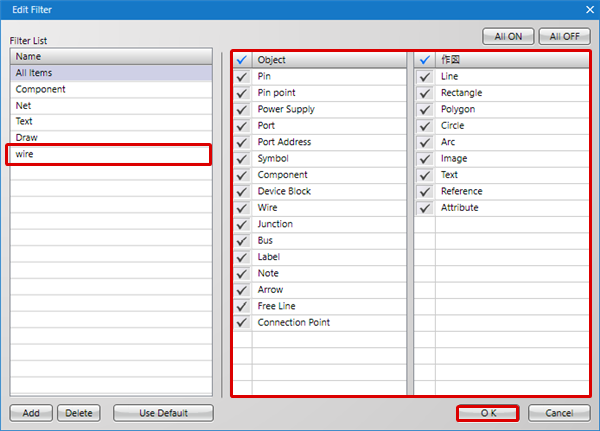
| The following will explain how to edit the Filter List (Edit, Add, Delete, Edit Name). |
| (1) |
Click "Filter List
=> [Edit Filter List]. |
|
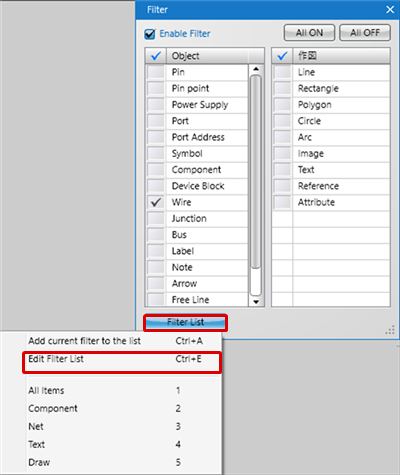 |
| |
The "Edit Filter" screen will open. |
|
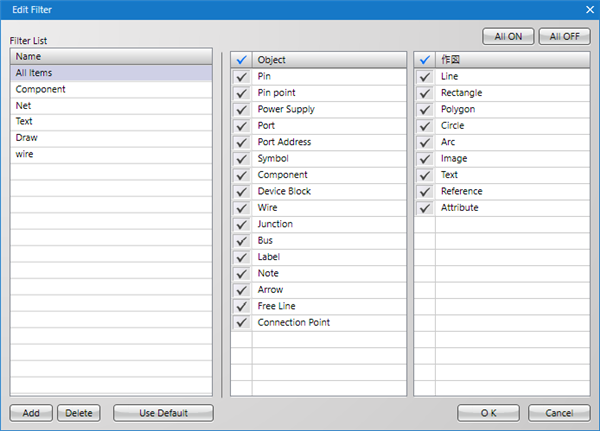 |
| (2) |
Select the filter that you want to edit from the Filter List. |
| (3) |
Change filters ON/OFF. |
| (4) |
Click "OK". |
|
 |
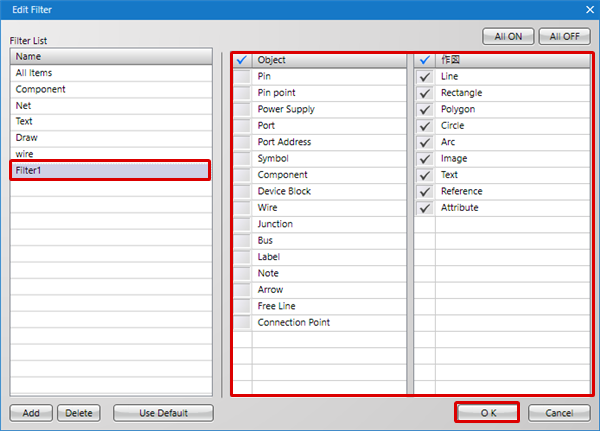
| The following will explain how to add to the Filter List. |
| (2) |
A new filter will be added.
* For more details about editing names, refer to Editing Filter List Names. |
| (3) |
Change filters ON/OFF. |
| (4) |
Click "OK". |
|
 |
| The following will explain how to delete from the Filter List. |
| (1) |
Select the filter name that you want to delete from the Filter List. |
| (2) |
Click "Delete". |
|
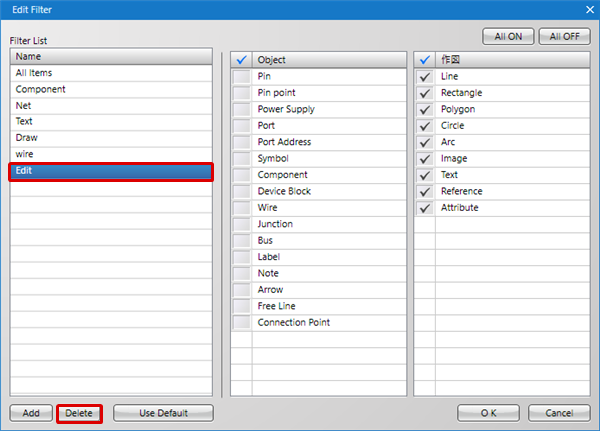 |
| |
The filter will be deleted. |
| (3) |
Click "OK". |
|
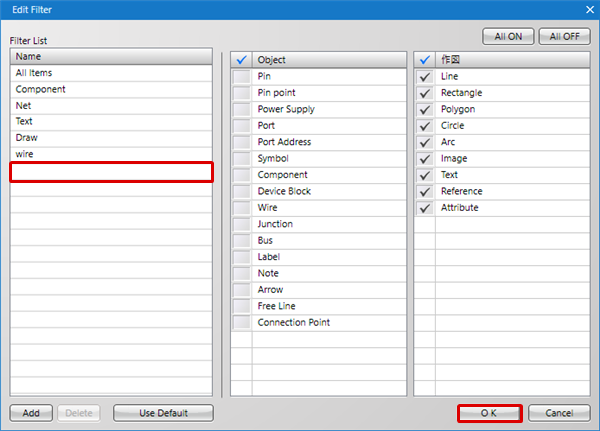 |
| The following will explain how to change a filter name. |
| (1) |
Select the filter for which you want to change the name from the Filter List.
Right click
=> [Rename].
Or, press the Shortcut Key "F2". |
|
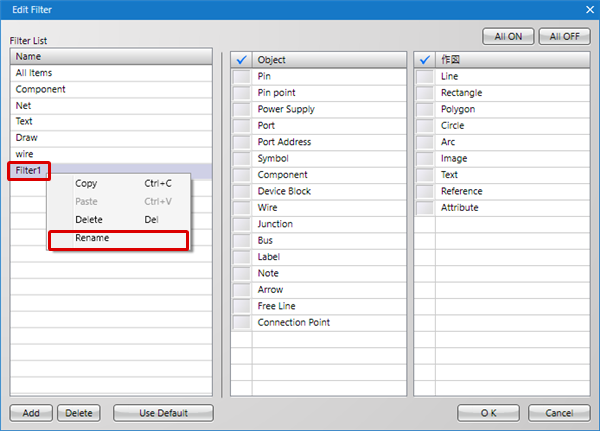 |
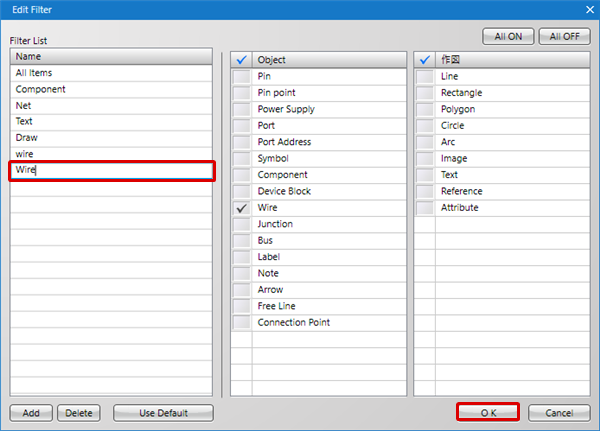
| (2) |
Input a Filter Name. |
| (3) |
Click "OK". |
|
 |
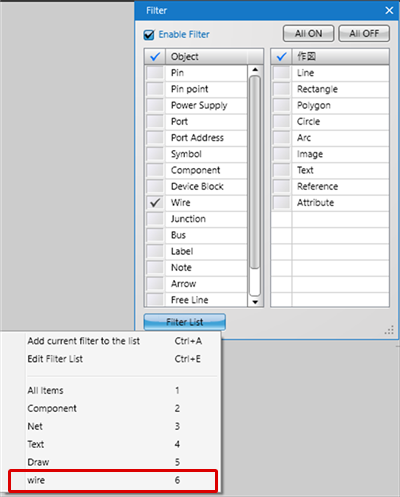
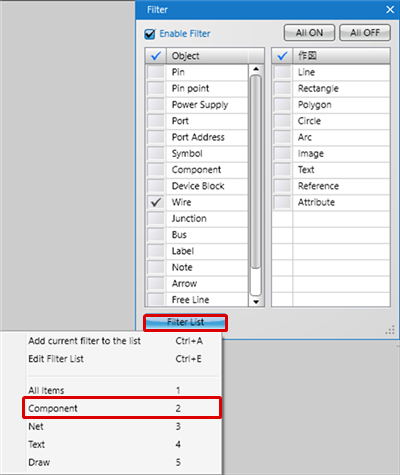
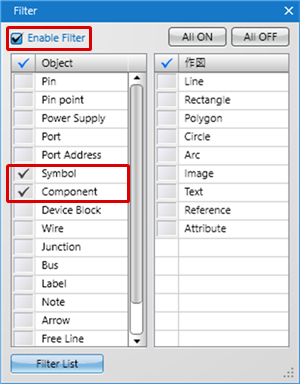
| The following will explain how to select a saved filter group from the Filter List and toggle. |
| (1) |
Click "Filter List" => "Filter Name". |
|
 |
| |
Enable Filter will be checked and the filters will toggle ON/OFF. |
|
 |