The following will explain the operation for placing symbols on a schematic.
To quickly find the symbol that you want from among the many symbols, is convenient to use Component Search, which executes a search according attributes or Model No.
Directly place a symbol on a schematic. Symbols will be temporary objects when the components are not determined.
Because footprints cannot be registered, when design is done in collaboration with a PCB, convert symbols to components or place the components.
It is possible to export Netlists even when symbols are placed directly.
There are two ways to place symbols.
Method 1. Placing Symbols from the Symbol Window(Recommended)
Method 2. Placing Symbols from the Place Symbol Dialog
|
Use the Symbol Window in the window on the right to place symbols.
The following is the operation for placing symbols from the Symbol Window.
|
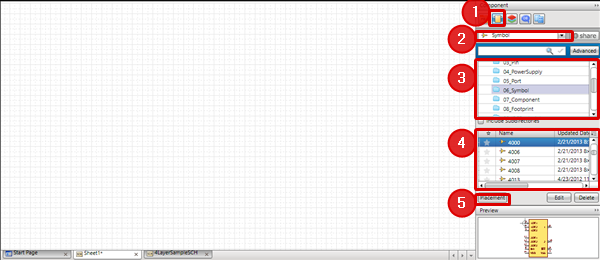
| (1) |
Enable the [Symbol Window]. |
| (2) |
Select [Symbol]. |
| (3) |
Select a directory. |
| (4) |
Select the symbol you want to place from the [Symbol List]. |
| (5) |
Click [Place], or double-click the symbol that you want to place => It will move to Place Symbol mode. |
|
 |
| (6) |
Click the location on the schematic where you want to place it. |
|
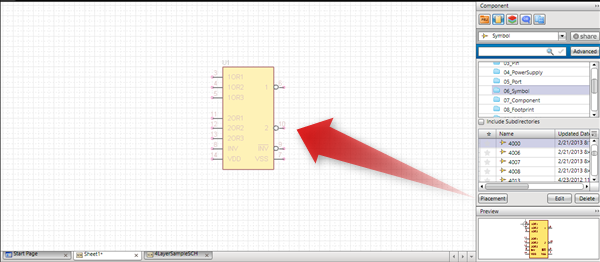 |
By placing a check for "Include Subdirectories",
all symbols below the selected Directory will be shown.
|
Use the Place Symbol dialog to place the symbol.
The following is the operation for placing symbols from the Place Symbol dialog.
|
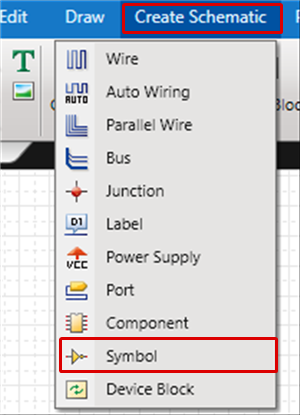
| (1) |
Click [Create Schematic]
=> [Symbol].
=> The [Place Symbol Dialog] will open. |
|
 |
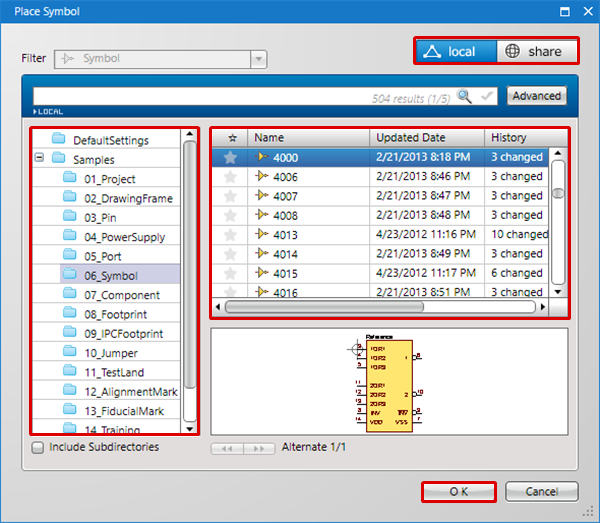
| (2) |
Select a directory. |
| (3) |
Select the symbol you want to place from the [Symbol List]. |
| (4) |
Click [OK], or double-click the symbol that you want to place
=> It will move to Place Symbol mode. |
|
 |
| 5) |
Click the location on the schematic where you want to place it. |
|
 |

