

Schematic Capture : Wiring and Editing
Adding and Editing Junctions
A Junction is an object that integrates intersecting wire nets.
By adding Junctions, intersecting wires are in the same Net.
There are two methods for adding junctions; Adding Junctions Automatically and Adding Junctions from the Menu.
The following will explain each operation for drawing a junction.
Adding Junctions Automatically
Selecting the Junction Menu
Adding a Junction
Exiting Junction Mode
Deleting a Junction
Adding Junctions Automatically
| Adding Junctions Automatically |
| When a "T" intersection is created by wiring, a junction is added automatically. There is the following method for adding a junction automatically. |
|
|
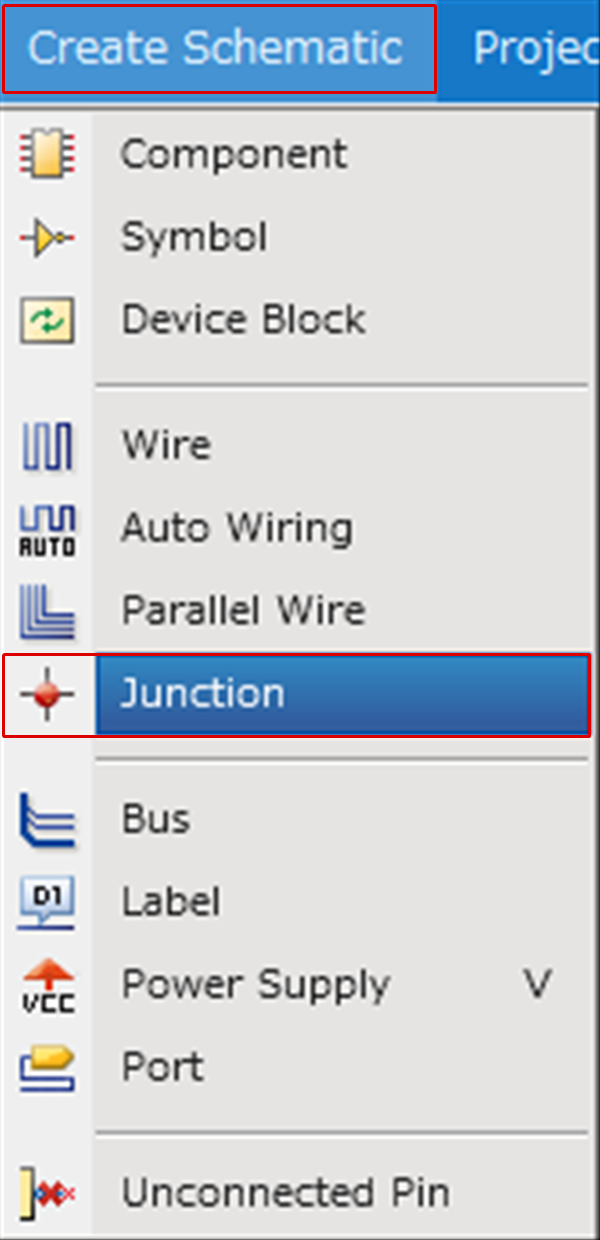
Selecting the Junction Menu
Select [Create Schematic] => [Junction]
There are several other ways to perform this. Refer to About Executing Menus.
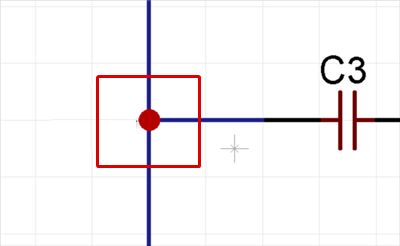
Adding a Junction
After selecting the Junction Menu,
STEP 1: Click the wire intersection
| Adding a Junction |
| The following is the operation for adding a junction from the Menu. |
|
 |
|
 |
When adding a junction to wires where a label is placed in order to integrate the Net,
the Net integration process will work and Label Names will be merged.
Exiting Junction Mode
The following is the operation for exiting Junction mode.
Right click, Select => [Cancel]
* Press "Escape" on the keyboard
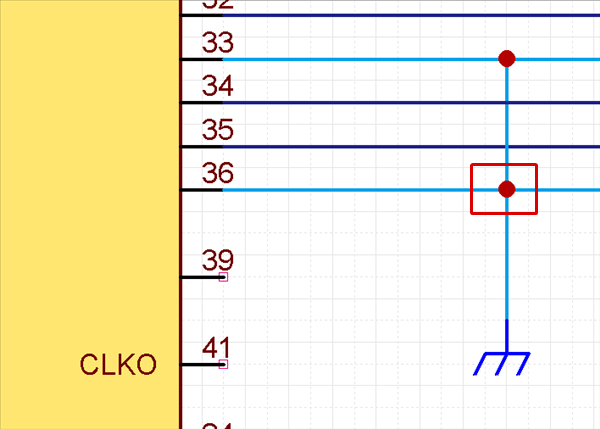
Deleting a Junction
The following is the operation for deleting.
Select and press the Delete key.
| Deleting a Junction |
| Delete a junction that was added. When a junction is deleted, integrated wires will become separate Nets. The following is the operation for deleting junctions. |
|
 |
|
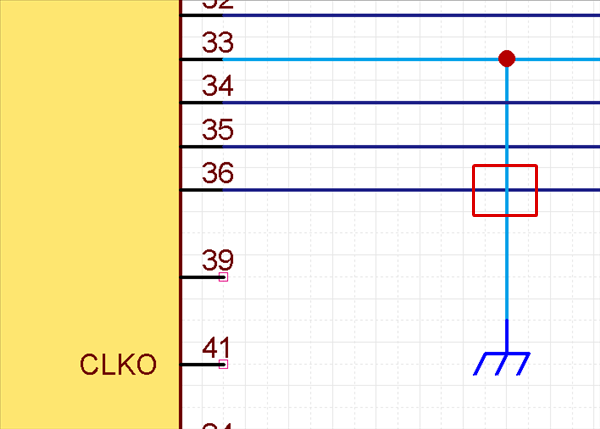 |
Only cross junctions can be deleted. "T" junctions cannot be deleted.