Before using
Data Migration from Community Version to Professional Version
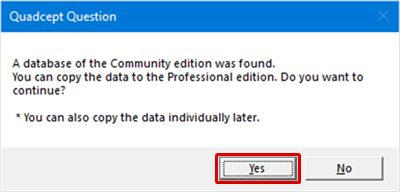
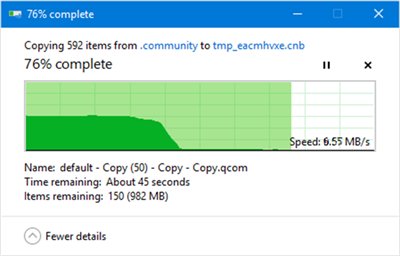
All the data created in the Community version can be migrated to the Professional version. The following explains how to transfer the Community data to the Professional edition.
| Migrating data from Community to Professional |
| The following explains how to transfer the Community data to the Professional edition. |
|
 |
|
 |
|
 |
|
 |
|
 |
To migrate data individually:
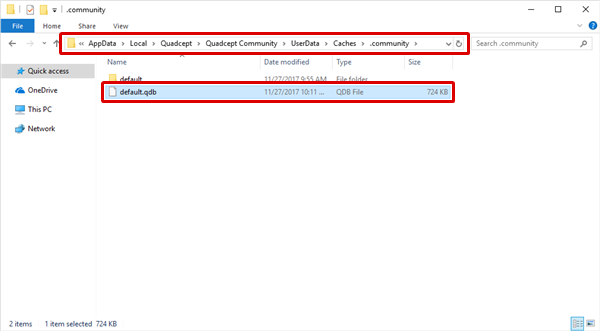
If you do not migrate your data on the first boot-up of the Professional edition and move the data individually later, you can copy it by the "Copy between Databases" function. The database of the Community version is stored in the following location. After selecting the "Copy between Databases" command, select the "default.qdb" in the folder to migrate the Community data.
Location:
C:/Users/[UserName]/AppData/Local/Quadcept/Quadcept Community/UserData/Caches/.community